When you’re writing a book with many characters or places it’s convenient to be able to filter all scenes starring the same character or place. Or maybe you’re a blogger and want to keep track of which blog posts are rough drafts and which are ready for publishing. In these and many more cases you might want to take a look at keywords.
For starters, you can add keywords to a single sheet by opening the attachment pane with ⌘4 and clicking the tag icon at the top of the attachment pane. This is also accessible as part of the Edit menu (“Edit” › “Attach” › “Keywords…”).
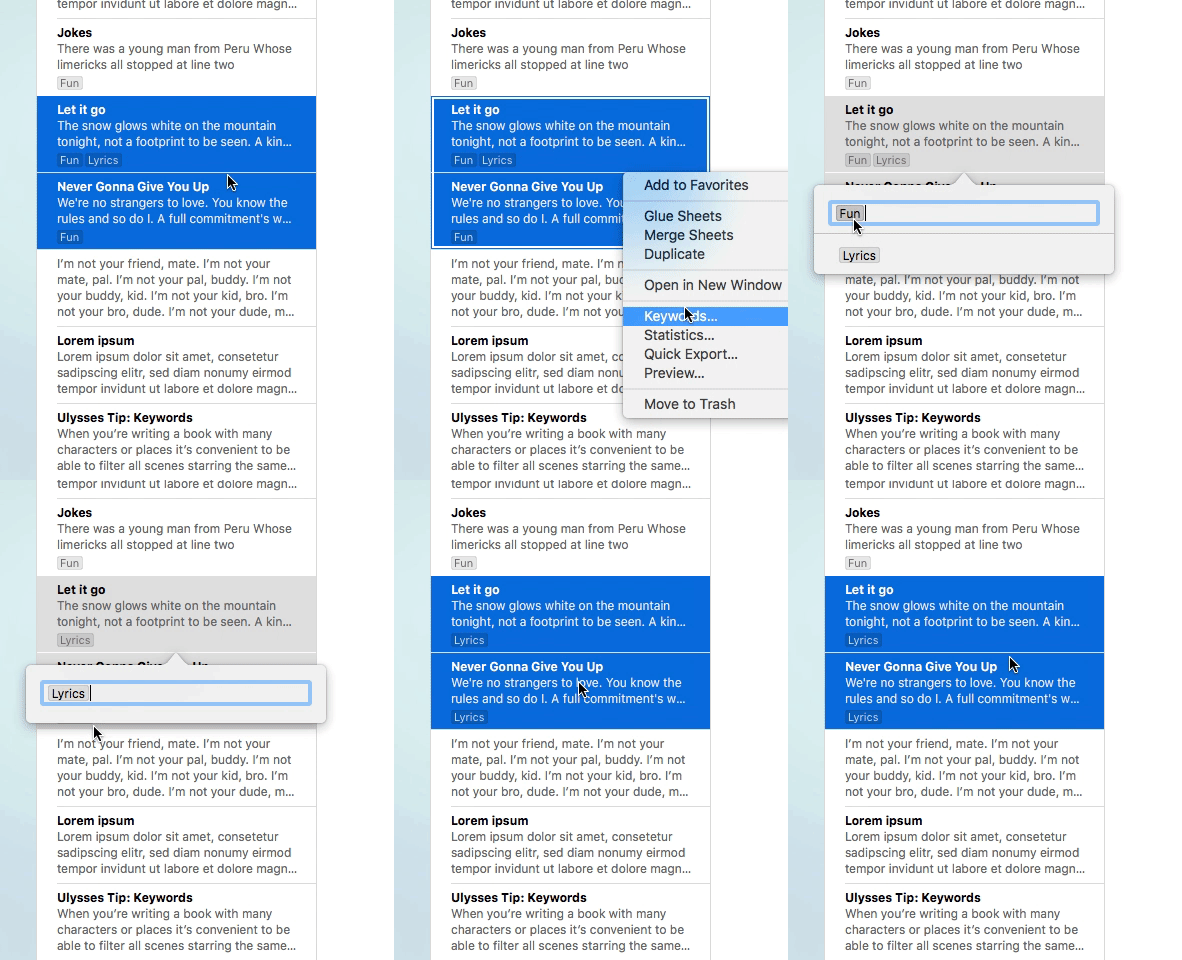
If you’d like to add keywords to multiple sheets, select them in the sheet list, open the context menu and click on “Keywords…”. If the selected sheets have different keywords, the popover will feature two parts. The field at the top contains all keywords that are attached to all sheets you’ve selected. To add more keywords simply enter them here. The lower half of the popover is a collection of keywords that are only present in a subset of the selection.

Clicking on one of the keywords in the lower half (or dragging it into the input field) will add it to all selected sheets. Dragging any keyword out of the popover removes it.
It’s up to you whether to display keywords in the sheet list or not – also read the previous post about how to customize your sheet list. If you’re a heavy user of keywords, you might want to consider setting a shortcut for assigning keywords to sheets.
